Adventures in new-z-land: Configuring LVM on zLinux

This week I'm honing my skills on Domino for zLinux. z/VM allows to run a nearly unlimited number of guests with various operating systems. For Domino IBM supports Suse 64Bit Linux and Redhat 64Bit Linux. The Domino server is a full 64Bit implementation on zLinux. The mainframe also supports all sorts of storage. Typically one would find large disk farms with iSCSI connectors, but the "traditional storage" would be DASD (direct attached storage device). z/VM makes DASD devices visible as 1, 2, 4, 8, 24 and 54 GB storage devices. So instead of going after a large chunk of the attached iSCSI I decided to get a set of smalish DASD devices and test the Logical Volume Manager on Linux to combine them into a larger entity. This is relevant also for standard Linux server (with bigger disk to start with) once you run out of storage on your RAID 10 storage and want to add more. While Domino offers directory links LVM is more flexible since it will appear as single storage to the application. LVM is a standard feature of Linux and is available on all mayor distributions (You might need to install the files first). In my test I used RedHat Enterprise Linux 5.2 for zOS, where LVM is pre-installed (check this Redbook for details). LVM pools physical disks, RAID arrays or SAN storage into "Volume Groups". Inside such a group multiple partitions can be created that then are formatted with a file system. Volume groups can be extended just by adding disk and thereafter carry additional partitions or allow to enlarge the partitions to cater for more data
Depending on the file system it might need to be unmounted before it can be extended, so we typically don't see the root ( / ) or boot partition inside a volume group. There are a number of steps involved to configure the LVM which are almost identical on all Linux versions, except for dealing with raw storage (which would be DASD in my case). I configured all steps using the command line. If that is not your cup of tea, Redhat provides the command
New disk needs to get formatted using the command
With
or this (in the GUI)
Now using the command
The logical volume then can be divided into partitions as if it was a single physical disk. You could start with partitions of the same size and after using them for a while shrink the underused and enlarge the ones that run out of space. To create a volume you use the command
(To be very clear: the layout above probably wouldn't perform very well. It is for illustration only!) Last not least add the partitions to /etc/fstab for automatic mounting. The default would be as a directory in /local/lotus/data but I prefer keeping them in the home directory of the user "domino" which I use for the Domino server. So my fstab entry looks like this:
As usual: YMMV
Depending on the file system it might need to be unmounted before it can be extended, so we typically don't see the root ( / ) or boot partition inside a volume group. There are a number of steps involved to configure the LVM which are almost identical on all Linux versions, except for dealing with raw storage (which would be DASD in my case). I configured all steps using the command line. If that is not your cup of tea, Redhat provides the command
system-config-lvm that provides a GUI (which I used for the screen shots). To get the GUI working you need to login into zLinux with ssh -X to start support for XWindows (Windows users: check what application supports XWindows). As first step we want to checkwhat physical storage devices are attached. On zLinux we use lsdasd to get a complete list of our storage:
[root@z10p2-linux3 ~]# lsdasd
Bus-ID     Status      Name      Device  Type  BlkSz  Size      Blocks
==============================================================================
0.0.0100   active      dasda     94:0    ECKD  4096   22992MB   5886000
0.0.0101   active      dasdb     94:4    ECKD  4096   7031MB    1800000
0.0.0102   active      dasdc     94:8    ECKD  4096   7031MB    1800000
0.0.0103   active      dasdd     94:12   ECKD  4096   7031MB    1800000
0.0.0104   active      dasde     94:16   ECKD  4096   7031MB    1800000
0.0.0105   active      dasdf     94:20   ECKD  4096   7031MB    1800000
0.0.0106   active      dasdg     94:24   ECKD  4096   7031MB    1800000
0.0.0107   active      dasdh     94:28   ECKD  4096   3880MB    993420
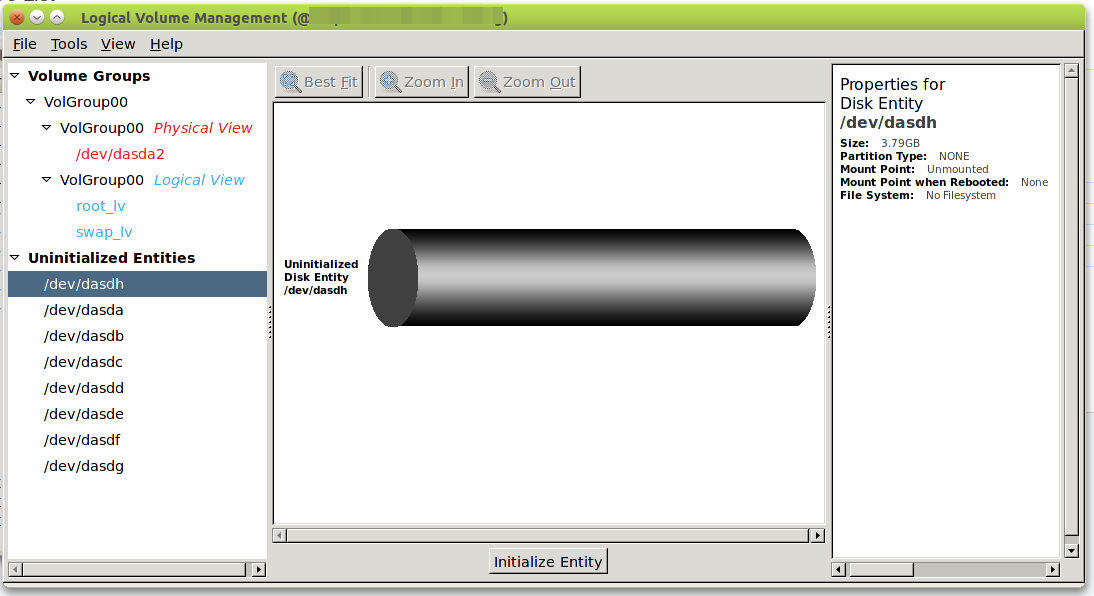
New disk needs to get formatted using the command
dasdfmt -b 4096 -y -f /dev/dasdi. Page 199 in the Redbook explains that. Using ls /dev/dasd\* one now can see the formatted disks. If there is already a partition on them it will be shown as a number behind the id letter. The GUI shows them as gray cylinders
With
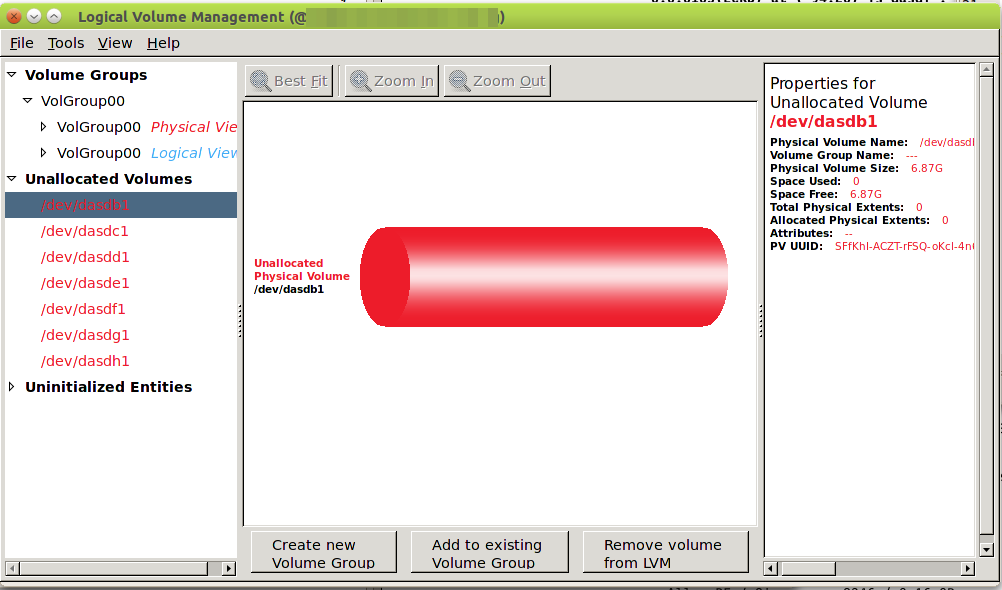
fdasd -a /dev/dasdi that disks are prepared to be used in a volume group. The command pvdisplay now shows all the physical volumes. An entry looks like this:
  PV Name               /dev/dasdh1
  VG Name
  PV Size               3.79 GB
  Allocatable           NO
  PE Size (KByte)       0
  Total PE              0
  Free PE               0
  Allocated PE          0
  PV UUID               SWocnz-XBEr-8Evm-jcZr-YXgb-94rx-adMTRT
or this (in the GUI)
Now using the command
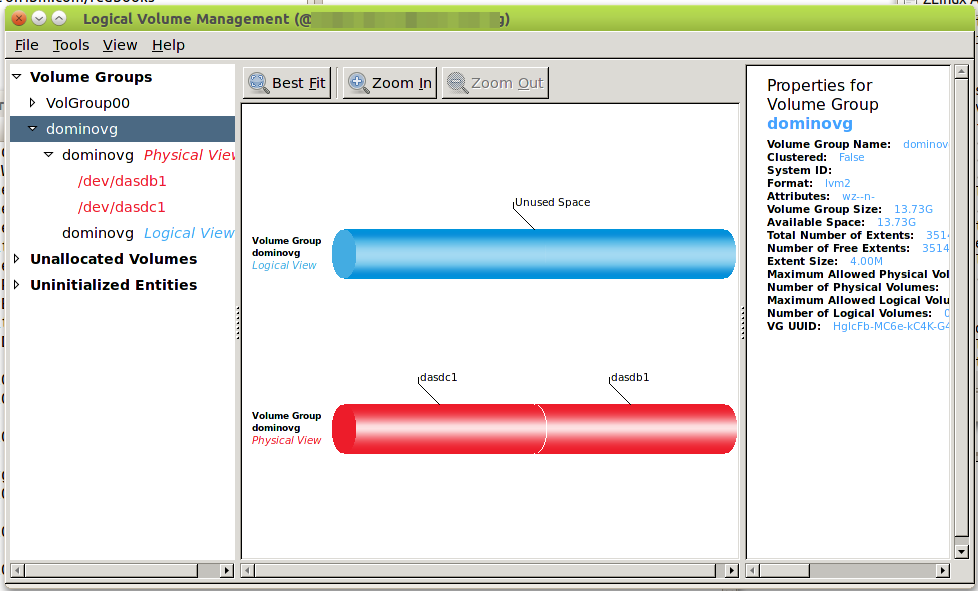
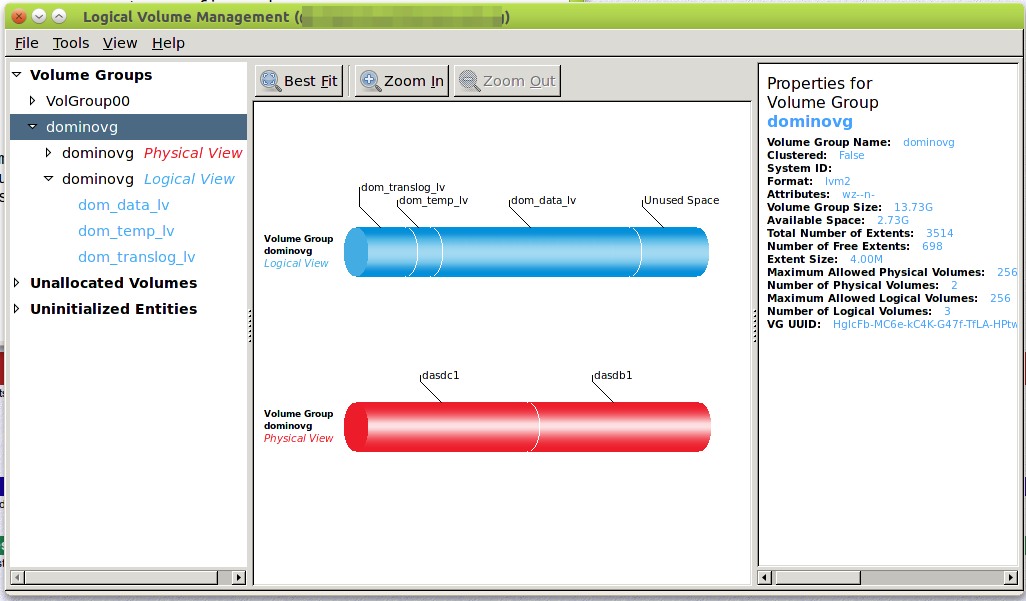
vgcreate dominovg /dev/dasdh1 /dev/dasdk1 the physical volumes are combined into a logical volume group, that can be displayed with vgdisplay. In the GUI it looks like this:
The logical volume then can be divided into partitions as if it was a single physical disk. You could start with partitions of the same size and after using them for a while shrink the underused and enlarge the ones that run out of space. To create a volume you use the command
lvcreate -L 50G domino_data_lv dominovg to create a 50 GB logical volume. It will be mountable as /dev/dominovg/domino_data_lv. Before use you need to add a file system using this command: mke2fs -j /dev/dominovg/domino_data_lv. Repeat with the other partitions. The result looks like this:
(To be very clear: the layout above probably wouldn't perform very well. It is for illustration only!) Last not least add the partitions to /etc/fstab for automatic mounting. The default would be as a directory in /local/lotus/data but I prefer keeping them in the home directory of the user "domino" which I use for the Domino server. So my fstab entry looks like this:
/dev/dominovg/dom_data_lv /home/domino/data ext3 noatime,defaults,errors=remount-ro 0 0 (The noatime prevents a write back everytime a NSF is read). Once you wrap your head around LVM concepts the process is quite straight forward. Make sure you familiarize yourself with z/VM resources for Linux and read the cookbook for Redhat zLinux Enterprise 5.4 or Suse zLinux SLES 10.
As usual: YMMV
Posted by Stephan H Wissel on 05 January 2011 | Comments (0) | categories: Linux Show-N-Tell Thursday