Put an angular face on your inbox

In the last installment I got vert.x to emit a Notes view, read from your local mail file, to be emitted as JSON stream. While that might be perfectly fine for the inner geek, normal mortals want to look (and interact) with something more pretty.
The cool kids on the block for web interfaces and applications are Twitter BootStrap and AngularJS, so these will be the tools in this installment.
Not familiar with them? Go and watch some videos. Back? Let's get going.
Since I'm not much of a designer, I choose the ready made Admin LTE template based on bootstrap. The main reason for choosing this one, was a timeline layout that I wanted for the inbox.
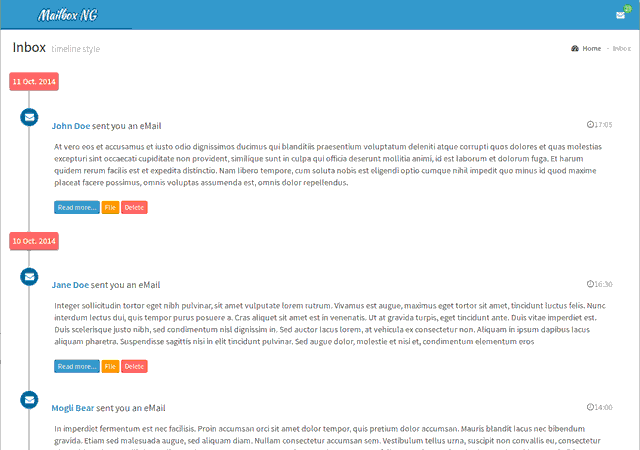
My inbox is already sorted by date, so it should fit nicely (so I thought). However the view optically is categorized by date and under the hood just a flat list of
The steps to get there:
In my page template I defined the Angular app and controller on the body level:
This was necessary to be able to have the message count displayed in the upper right hand corner:
The template pieces are short, this is the main page (excerpt, download link below):
The interesting part in the above template are the
So far so good, now the final moving piece is the Angular app code. A little word of warning: the following code is a ugly hack. For production quality you would separate out the data fetching into a service and you add tests and error handling. Anyway, learning and poking around doesn't need this, so here you go:
The interestin part is the
The cool kids on the block for web interfaces and applications are Twitter BootStrap and AngularJS, so these will be the tools in this installment.
Not familiar with them? Go and watch some videos. Back? Let's get going.
Since I'm not much of a designer, I choose the ready made Admin LTE template based on bootstrap. The main reason for choosing this one, was a timeline layout that I wanted for the inbox.
My inbox is already sorted by date, so it should fit nicely (so I thought). However the view optically is categorized by date and under the hood just a flat list of
<li> elements. A little tweaking was necessary. The result looks quite OK for an after hour exercise:
The steps to get there:
- Tweak the vert.x service to render a categorized by date version of the inbox. You can do that without touching the underlying view. I'll provide details on that modules in a later article (and some sample data below). The main difference for now: the inbox data will be available at the URL
/notes/categorized/($Inbox) - Create templates and directives for Angular
- Create the Angular.js app and its Controllers
{ "messagecount": 23, "messages": [
    {"date": "11 Oct. 2014", "events": [
         {"time": "17:05","sender": "John Doe","message": "message 1"}
    ]},
   {"date": "10 Oct. 2014", "events": [
       {"time": "16:30","sender": "Jane Doe","message": "message 2"},
       {"time": "14:00","sender": "Mogli Bear","message": "message 3"},
       {"time": "10:00","sender": "F. Zappa","message":"message 4"}
    ]
}]}
In my page template I defined the Angular app and controller on the body level:
<body class="skin-blue" ng-app="inbox" ng-controller="dayController as dc">>This was necessary to be able to have the message count displayed in the upper right hand corner:
<span class="label label-success">{{dc.messagecount}}</span>.
The template pieces are short, this is the main page (excerpt, download link below):
<section class="content">
 <div class="row">
  <div class="col-md-12">
   <ul class="timeline">
    <li class="time-label" time-line-start ng-repeat-start="day in dc.days"></li>
    <li time-line-end event="day.events[0]" day="day" ng-repeat-end></li>
    <li><i class="fa fa-clock-o"></i></li>
   </ul>
  </div>
 </div>
</section>
The interesting part in the above template are the
ng-repeat-start and ng-repeat-end statements. What they do: for every date in the JSON, they will create two <li> entries: one for the date and one for the first message. Angular then needs to be convinced to expand that into all messages. More on that below. The individual message entries use this template:
<i class="fa fa-envelope bg-blue"></i>
<div class="timeline-item">
 <span class="time"><i class="fa fa-clock-o"></i>{{event.time}}</span>
    <h3 class="timeline-header"><a href="mailto:noreply">{{event.sender}}</a> sent you an eMail</h3>
    <div class="timeline-body">
         {{event.message}}
    </div>
    <div class='timeline-footer'>
       <a class="btn btn-primary btn-xs">Read more...</a>
       <a class="btn btn-warning btn-xs">File</a>
       <a class="btn btn-danger btn-xs">Delete</a>
    </div>
</div>
So far so good, now the final moving piece is the Angular app code. A little word of warning: the following code is a ugly hack. For production quality you would separate out the data fetching into a service and you add tests and error handling. Anyway, learning and poking around doesn't need this, so here you go:
  angular.module('inbox', ['ngSanitize'])
   .controller('dayController', ['$http',dayMessages])
   .directive('timeLineStart', timeStartAccess)
   .directive('timeLineEnd', ['$compile',timeEndAccess])
   .directive('timeLine', timeAccess);

function dayMessages($http) {
var self = this;
self.messageCount = 0;
$http.get('days.json').then(function(response) {
self.days = response.data.messages;
self.messagecount = response.data.messagecount;
console.log("Data fetched");
}, function(errResponse) {
console.error('Error while fetching menu data!');
});
}

function timeStartAccess() {
return {
replace : false,
transclude: true,
scope : true,
template : "<span class='bg-red'>{{day.date}}</span>"
};
}

function timeEndAccess($compile) {
   return {
    transclude: true,
    scope : {event : '=',
          day : '=' },
    template : "<!-- messages from {{day.date}} -->",
    link : function timeLink($scope, $element, $attrs) {
      var newHTML = "<li event='event' time-line ng-repeat='event in day.events'></li>";
      var linkingFunction = $compile(newHTML);
      var elem = linkingFunction($scope);
$element.after(elem);
}
};
}

function timeAccess() {
return {
replace : false,
scope : {event : '='},
templateUrl : "demotimeline.html"
};
}
The interestin part is the
link function in the timeEndAccess function. Since we have an outer loop over the date creating one li element per date, instead of one per message for that date, the function replaces that with a loop over the messages for that day. Seems to work quite nicely. The template contains Angular code, so it needs to compile, that's what $compile does for us. You can try for yourself, to run the Demo:
- Download the Admin LTE template and expand it
- Download my sample files and copy them into the directory where you have expanded the template. Put it into the template root
- Either download Angular.js or edit my sample to point to a CDN
- Open
demoinbox.htmlin your browser and enjoy
days.js, so no vert.x or Domino is required for you to have a look. As usual YMMVPosted by Stephan H Wissel on 30 September 2014 | Comments (0) | categories: IBM Notes JavaScript Software WebDevelopment